A New Starting Point - Show and Tell - Saturday March 13th

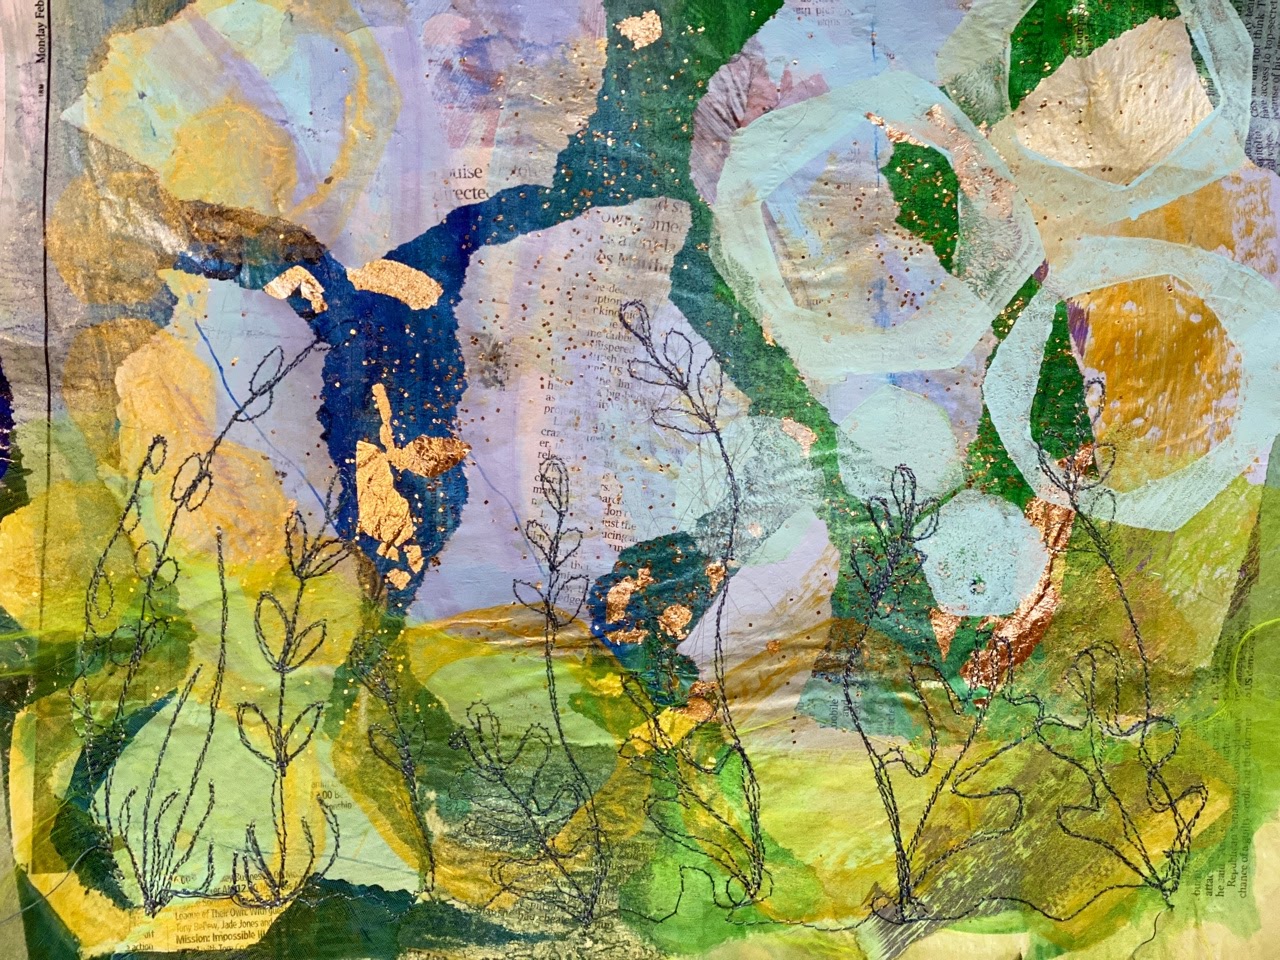
A fabulous sample by Lynda

 The group that were on my first Zoom workshop, A New Starting Point, 2 weeks ago, had their 2 hour Show and Tell yesterday. Again on Zoom.

Wow!! what a great group. Such enthusiasm. Whilst Zoom isn't the best thing for a workshop, at the moment, it is the only choice we have. For the Show and Tell it was perfect. 12 students from the UK and Ireland, having a chat over coffee and talking about their work for 2 hours. What a treat it was, for all of us. I wanted to have some  sort of catch up after the Zoom workshops. I always wondered if the students had developed any work from any of my workshops when I used to teach pre covid. Some students were kind enough to send me images, but you never really knew. 

With a dedicated catch up, 2 weeks after the workshop, it gives the group a chance to develop their samples, or do more, have a play . .  and have a date to work towards. 

Just look at this collection of gorgeousness!!!

A New Starting Point encourages students to play with old papers, maps, music . . The way the day is structured helps the group not to be concerned with what they are creating, the process does the work for them. You don't have to think about it too much. They can just enjoy playing with colour, texture and sparkle. 

I mentioned that the leather like interfacings Decovil 1 and Decovil 1 light, (https://www.vlieseline.com/Products/Creative-Range/Decovil-I-Light) make great book covers and bags. You iron your fabric, or in our case, your decorated papers, onto the fusible side of the interfacing.

Teresa has made several slip covers for books using the Decovil. Don't they look fabulous. The surface has been sealed with several layers of acrylic wax.


As you can see, Teresa has printed and machine stitched onto her decorated paper. 
 
Teresa has added some purple net to this cover for added texture.

 Lynda enjoyed working with different colour combinations.

 You can see how much Lynda enjoyed using the transfer foil, silver in this case.
This piece is now gracing a canvas.


Sue was quite prolific. She finished several projects in the 2 weeks, here are 2 of them. This is Sue on Zoom, showing us her amazing bag that she created with a large piece of decorated paper, stabilised with a firm interfacing and sealed with several layers of acrylic wax.


This is a box Sue made with all her extra torn strips, it even has a lid.

 The box is a very useful. Great for storage, we all need more storage!!
 
Meryl had great fun playing with this process, she also made some great cards.
Here is a tree decoration and 3 little paper birds . . . 

 
This is Meryl during the Zoom meeting yesterday, talking us through her samples and showing us some of her 3D pieces.


 One of Meryl's 3D pieces

With this process you can end up with smaller torn pieces, Meryl used these to good effect on gift tags. Don't they look great?

Frances decided to mute her colour pallete. If you work in black and white you can see every texture and mark and shape. Colour can very distracting.

Frances used ordinance survey maps and foreign language papers to create this fabulous piece of work. It is mounted on a canvas.

Most of the students I teach work in textiles. And sometimes, working with paper can cause a little - discomfort. 
(You will be remember this Mary Smith, I can still remember the tantrums!! I am laughing just thinking about it) 
After working with the samples for a couple of weeks, Julia wasn't particularly enjoying the 'papery' feel of her samples!! However, she persevered and tried some free machine stitching on a larger sample. Julia will be developing this theme for the next catch up.  We don't have to enjoy every process we learn. But it is important to experiment - because you never know until you try.  

 Decorating the paper sample with stitch as you would a fabric sample, can you get you through your discomfort. I love Julia's painterly way of using colour.

Jill created some beautiful work in gorgeous tones of blue and gold.

 This is Jill holding up her work on the Zoom call.

Georgina's piece is beautifully considered. Keeping her colour palette muted, and printing and then stitching with the same colours that are in the work. You can see all the textures.
 
It will be interesting to see what Georgina ends up doing with this piece.

It's always good fun when students you have worked with before sign up for a workshop. It was lovely to work with Dee again. Dee is an experienced textile artist, her use of colour is fabulous. Dee decorated some of her samples with free machinery on polyester organza. Don't they work well?

 I love these birdies, its good to them again.

 More birdies and a building, free machine embroidered polyester organza.
I am looking forward to seeing what Dee has created on our next catch up.
 
Bee created several samples, I love this one, it is quite large and I love the way the black really lifts the piece. Never be afraid of trying black as a highlight.

 You can see that Bee has decorated her sample with some set machine stitches in a thread that tones with the work.

Which brings us to Aiseling - 
Aiseling has recently been creating screen prints on paper and fabric, of her local woodland. Over the past 2 weeks she has been incorporating some of the paper prints with the torn process from 2 weeks ago.


 2 great samples using colour, net overlay and hand stitch.
 
This is a much larger, more considered piece. Aisleing has chosen to use less colour so you can see all the texture. This piece is around 4ft wide. This blog post can't do it justice -

This is a detail of the larger piece -

In this detail you can see the net overlay and the way Aiseling has used toning threads to raise the surface.

I am looking forward to keeping in touch with this group to see how they develop their work.

***

I will be sending out a newsletter this week with my next 3 workshops for May, June and July. If you don't receive my newsletter, and would like to, just email me with 'mailing list' in the subject.


My Transfer Printing workshop at the end of March is full with a waiting list. I will be running it again later in the year.


This one has a couple of places left

To enrol on a workshop,
Send me an email with workshop in the subject.
  info@kimthittichai.com
Let me know which workshop(s) you are interested in, 2 or 3.  Along with a phone number. I will send you a PayPal invoice. Once this is paid - you will be on the workshop and I will send you the materials list.


Workshop 3 – Create Original Designs and Making Printing Blocks  €65
Saturday 24th April 10.00 am – 4pm, 1 hour lunch
 
Workshop 3 - Catch Up and show and tell
Saturday 8th May 10.30 – 12.30

The most important part of teaching for me, is to encourage students to create original work. This workshop is brilliant for those of you who want to create your own designs and then create your own printing blocks. We will work with an inspiration of your choice. If you have done the 'Journey' exercise with me, you could use that. The materials list will give you some ideas if not. You should finish this class with 2 pairs of printing blocks ready to print and maybe stitch for your show and tell.
To give you an idea of what we will be doing - have a look at this post on my blog

http://hot-textiles.blogspot.com/2014/08/extex-3-2nd-session-making-printing.html 


***


Hello Tod!!

x x x


Comments

Popular posts

Extreme Surfaces for Stitch - West Dean College July 17 - 20

Zap, Pow, Slash and Burn! Foredown Tower part the first

Hot Textiles at The Bridge, Brighton. 6th and 7th September

The Full Works - 2 day workshop, Solihull Embroiderers Guild 17th & 18th July

More prettys at Bobbys

West Dean - Layered Textiles - Hot Techniques for jewelled surfaces - part 2

Sussex Quilters - Tinkering with Tyvek workshop 5th June

West Dean - Layered Textiles - Hot techniques for jewelled surfaces part 3

Registering your interest in my online teaching . . .

Colouricious Textiles Holiday - Block Printing Jaipur. 20th - 30th September 2016