Paper, Print, Stitch and Play - Art Van Go 3rd - 5th September. Part the second . . .
A lovely sample of the tearing and layering process that has been decorated with a print using one of the colours in the work. Using a 'self' colour paint enables the print to bleed in and out of the work and not be too obvious.
As we only had six in the group the students were able to spread out and we managed to get a lot more done. The larger the group the slower things happen. The group caught onto the 'background' and 'pretty' rotation quickly, sometimes it can take a while. It never ceases to amaze me how the simplest process can sometimes take the longest to understand. I think our brains like to make things complicated, they get bored when something is too simple.
A few of the torn and layered backgrounds -
Pru added frayed fabric thread to this sample -
It add an extra texture - if you are aiming for a lot of texture - you need to keep the colours down to a low roar . . tones of one colour tend to work best.
I always insist on the students doing at least four tearing processes so their piece looks very layered with fab torn edges. I didn't want the group to get too attached to any of their samples otherwise they wouldn't tear them up.
However - I was proved wrong at one point. (don't you love it?)
Pat had produced this beautiful sample and was dithering about tearing it up.
This is the point that usually I swoop in and say "don't worry, tear it up, it will look fabulous". But . . it is such a beautiful piece. I agreed it shouldn't be torn up. This sample will look beautiful stitched and maybe even quilted in a few areas. It would just need to backed with a thin iron-on interfacing like Fuse n Tear to stop the paper falling apart when you stitch it.
I think this workshop is so popular because your work doesn't have to look like anything. The students can just enjoy the process and end up with stunning results. It removes the pressure to perform!!!
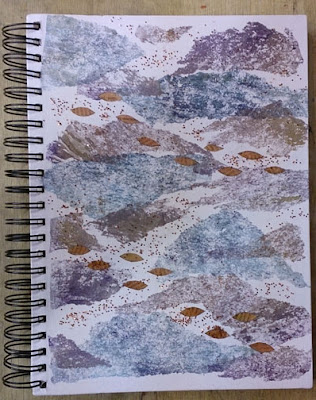
Carole had great fun decorating this book cover with painted Bondaweb, glitter and little fish shapes cut from newspaper.
The aim of the workshop was to develop newspaper backgrounds that would be printed with wooden printing blocks in a colour that is already in the work.
Once the background has been printed the same block is used to print onto Solufleece to give you a guide to free machine stitch into. (The Solufleece needs to be stretched in an embroidery ring before you print onto it. Print with the minimum of paint or the Solufleece will dissolve)
The Solufleece is then dissolved, leaving the free machine embroidered shapes. These shapes are then stitched onto the printed background.
Pat's
Brenda's
Shirley's
The printed and stitched backgrounds are then stuck onto a canvas that has been decorated with newspaper in a toning colour.
Christine decided not to print onto this one and just to enjoy working with the colours.
Carole's machine didn't want to play so she outlined her prints with a fine pen and made her focal point from newsapaper - it looks great.
Pru free machining her shape on the stretched and printed Solufleece.
Pru added a few strips of blue silk carrier rods to give the work more texture.
You can just see the prints on the newspaper background and that one of them has a backstitch outline.
We had a fabulous time at Art Van Go www.artvango.co.uk. The whole team look after you, it is a great luxury teaching there - and of course - it is always great fun. Art Van Go run workshops just about every week of the year - there is something for everyone and lots of B and B's close by if you need to travel to get there.
It won't be long til I see Viv and Kevin again - we are all doing the Knitting and Stitching shows at Ally Pally, Dublin and Harrogate - Whoo hoo - party time!!!
***
I am nearly up to date on the blog now - I just have to tell you about the larks we got up to at Denman College last weekend - I will probably do that on Sunday.
Have a great weekend
x x x x
Hello Jill and Diana.
x


Comments
Post a Comment